Netsuite Outlook Integration: A Quick Tutorial
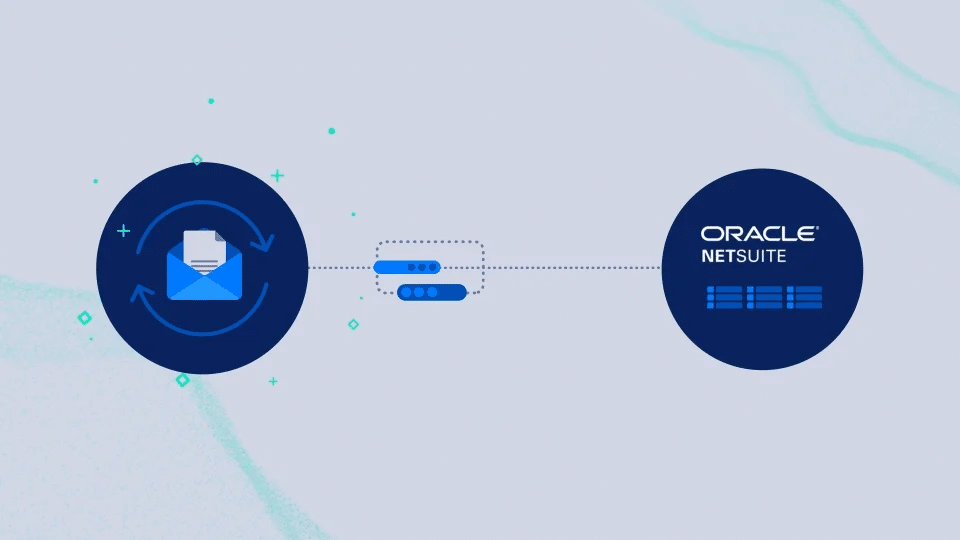
Integrating NetSuite with Outlook can streamline your workflow by synchronizing your email and CRM data. This integration allows you to access customer information, manage emails, and schedule appointments directly within Outlook, enhancing your productivity and ensuring you never miss important customer interactions. In this blog, we will walk you through the step-by-step process of setting up NetSuite Outlook Integration using Celigo CloudExtend. You can look for a consultation from a Netsuite CRM expert or a professional web development company,to help you seamlessly integrate these two powerful tools.
Step-by-Step Process for NetSuite Outlook Integration
Step 1: Install Celigo CloudExtend for Outlook
- Open Outlook and go to the Home tab.
- Click on Get Add-ins in the ribbon.
- In the Add-Ins window, search for CloudExtend.
- Click Add next to CloudExtend for NetSuite to install the add-in.
- Once installed, the CloudExtend icon will appear in your Outlook ribbon.
Step 2: Sign in to CloudExtend
- Click on the CloudExtend icon in the Outlook ribbon.
- A sidebar will open, prompting you to sign in to your CloudExtend account.
- Enter your CloudExtend credentials and click Sign In.
- If you don’t already have an account, follow the steps to create one.
Step 3: Connect CloudExtend to NetSuite
- After signing in, you will be prompted to connect CloudExtend to your NetSuite account.
- Enter your NetSuite credentials, including your account ID, email, and password.
- Follow any additional instructions to finish the connection.
- Once connected, you will see your NetSuite data in the CloudExtend sidebar within Outlook.
Step 4: Configure Sync Settings

- In the CloudExtend sidebar, click on the Settings gear icon.
- Adjust your sync settings according to your preferences. You can choose to sync emails, calendar events, and tasks.
- Select the folders you want to sync with NetSuite.
- Save your settings to start the synchronization process.
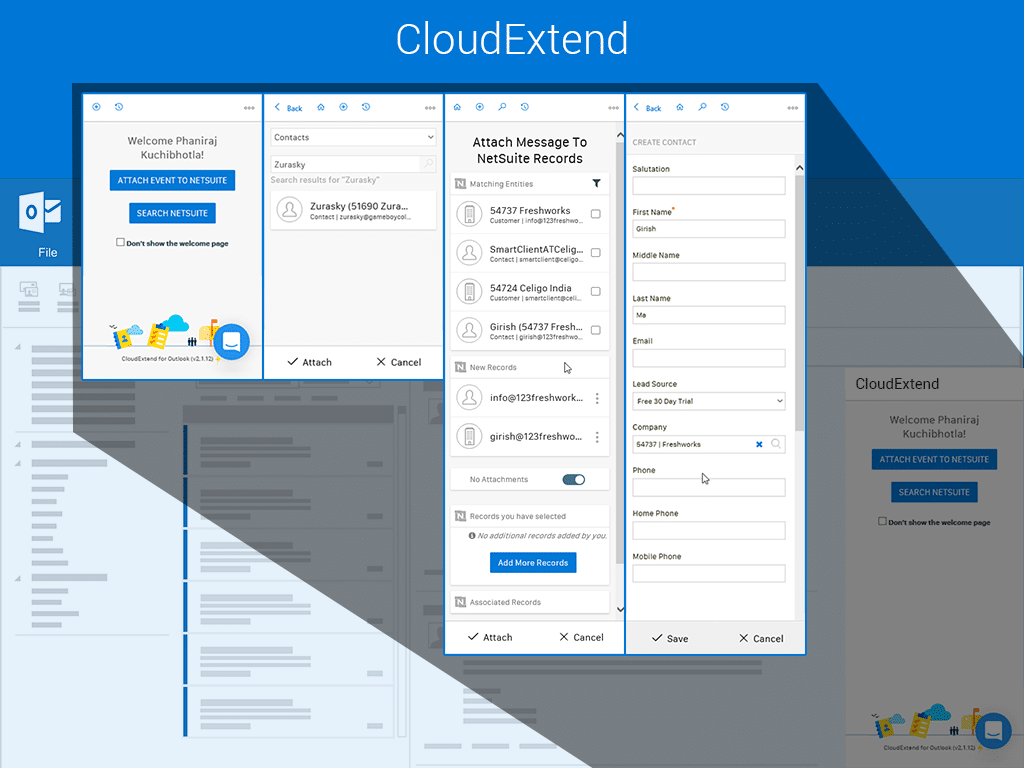
Step 5: Using CloudExtend in Outlook
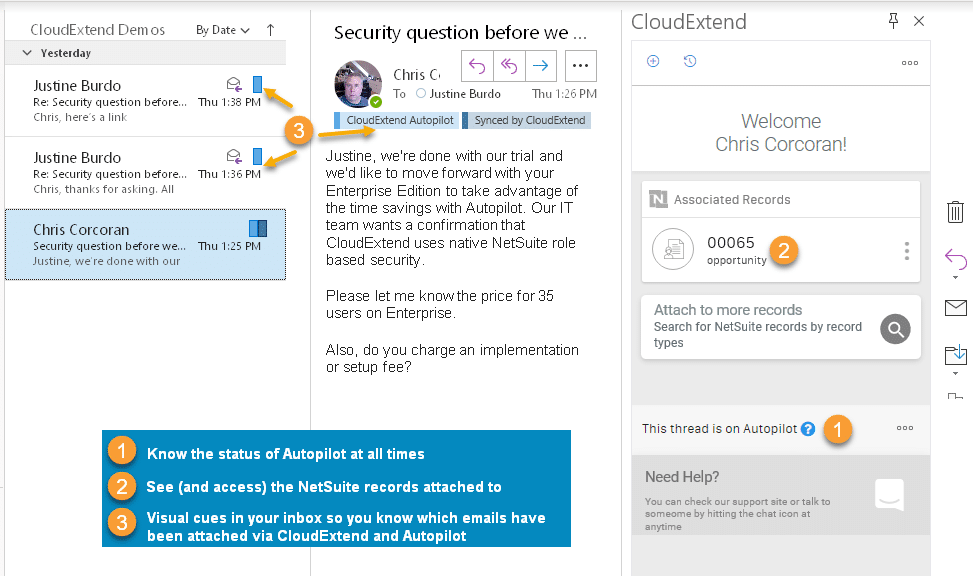
- To save an email to NetSuite, open the email and click the CloudExtend icon in the ribbon.
- In the CloudExtend sidebar, choose the relevant NetSuite record to associate with the email (e.g., customer, opportunity, or case).
- Click Save to link the email with the selected NetSuite record.
- Similarly, you can sync calendar events and tasks by selecting them and using the CloudExtend sidebar to associate them with NetSuite records.
Step 6: Managing NetSuite Data in Outlook
- Use the CloudExtend sidebar to view and manage your NetSuite data directly within Outlook.
- You can access customer information, view associated records, and even create new NetSuite entries from within Outlook.
- This seamless integration ensures that your email and CRM data are always in sync, providing a unified view of your customer interactions.
Conclusion
Integrating NetSuite with Outlook using Celigo CloudExtend is a powerful way to streamline your workflow and enhance productivity. By following these simple steps, you can ensure that your email and CRM data are always synchronized, allowing you to manage customer interactions more efficiently. Whether you’re a web development company, website developer, or NetSuite CRM expert, this integration can help you provide better service and maintain better relationships with your clients. Hire website developers and embrace the power of NetSuite Outlook Integration and experience the benefits of a unified, efficient workflow.

Akshima Jain
Content Production Manager